
This article will review the 3 steps to setup Group Registration for your event. Group Registration allows a person to register multiple people for an event. A good example of this would be an employee registering herself and her supervisor or multiple people from their organization. Another example would be an attendee registering themselves and multiple family members for an event.
- Step 1- Enable Group Registration
- Step 2- Add Group Registration to your Registration Form
- Step 3- Updating Confirmation
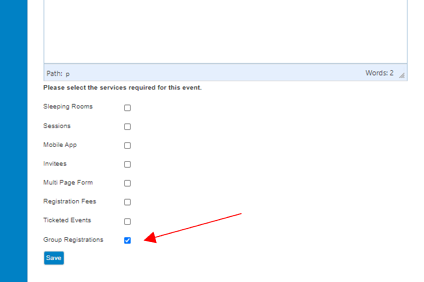
Step 1- Your first step to using group registration is to enable it. To do this, you will click on the Event Info tab.
Scroll to the bottom of the screen and select the checkbox next to Group Registrations. Hit Save at the bottom of the form.
Step 2- The second step in the process is to put some sections and fields on your registration form. Click on the Setup tab and Form Sections.
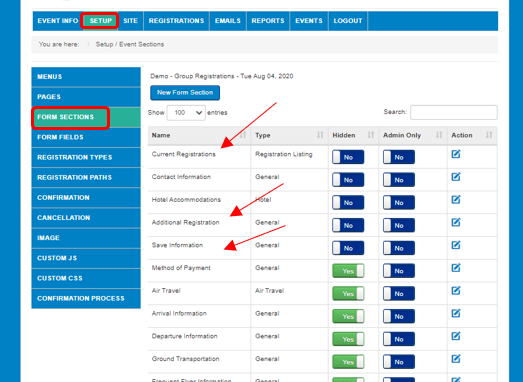
You will need to be sure three sections are displayed and not set to be hidden. The sections are:
Current Registrations
Additional Registration
Save Information
Be sure all these sections have the Hidden toggle bar set to No.

Placement of these sections also plays a part. Current Registrations would be at the top of the list. You will want this information to appear first. Additional Registration and Save Information will be a the bottom of your sections. All of your other registration form sections would go in the middle. If you need to move, simply move the sections to the proper order using your mouse.
Next you will want to go into Setup-Form Fields.
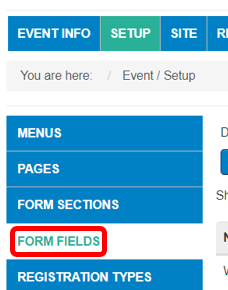
You will want to enable each field that shows up under the three sections you created. The fields should default in but you will need to slide the Enabled box over to Yes.

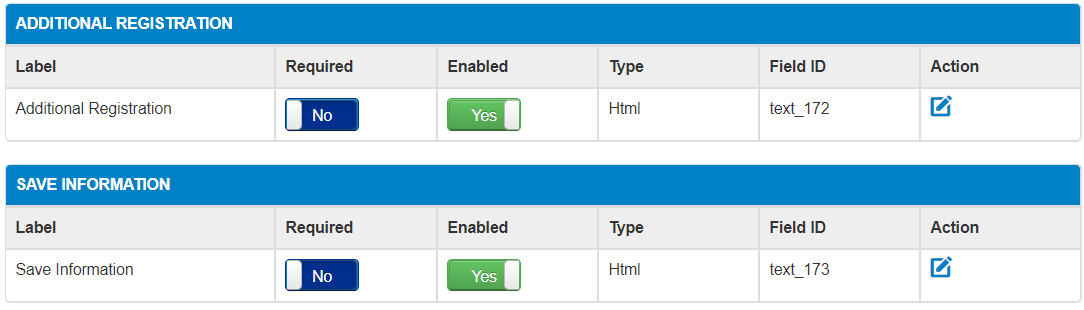
Please note some rules for the fields:
Registration Listing- This field is what is used to display previous registrations when someone is going through the registration process. Please be sure to not edit this field and change the Field Type.

Additional Registration- You can edit this field under actions. Feel free to change the text that displays above the buttons but do not change the buttons for either Additional Registration or Review Registration. Both of these buttons display at the bottom of the screen when someone is in the registration process.

Save Information- This field is used when someone is editing their registrations. The Save Information button at the bottom of the form will display. You do not want to edit this button.

Step 3- The last step in the process is to update your confirmation. The Group registration confirmation uses code to display multiple registrations correctly on one confirmation. To work properly, you will set this up differently then you have for other registration sites that do not use group registration. To update your confirmation, first go to Setup-Confirmation.
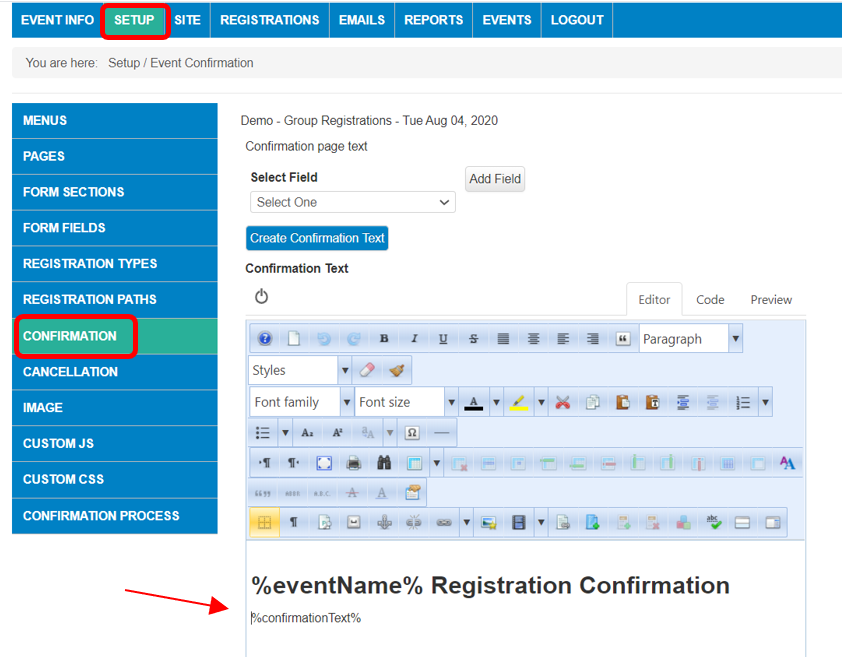
Your confirmation will need to have the text below added. Clear out anything that may be in there except the header as shown above. Add the following:
%confirmationText%
Be sure to hit Save at the bottom of the screen.
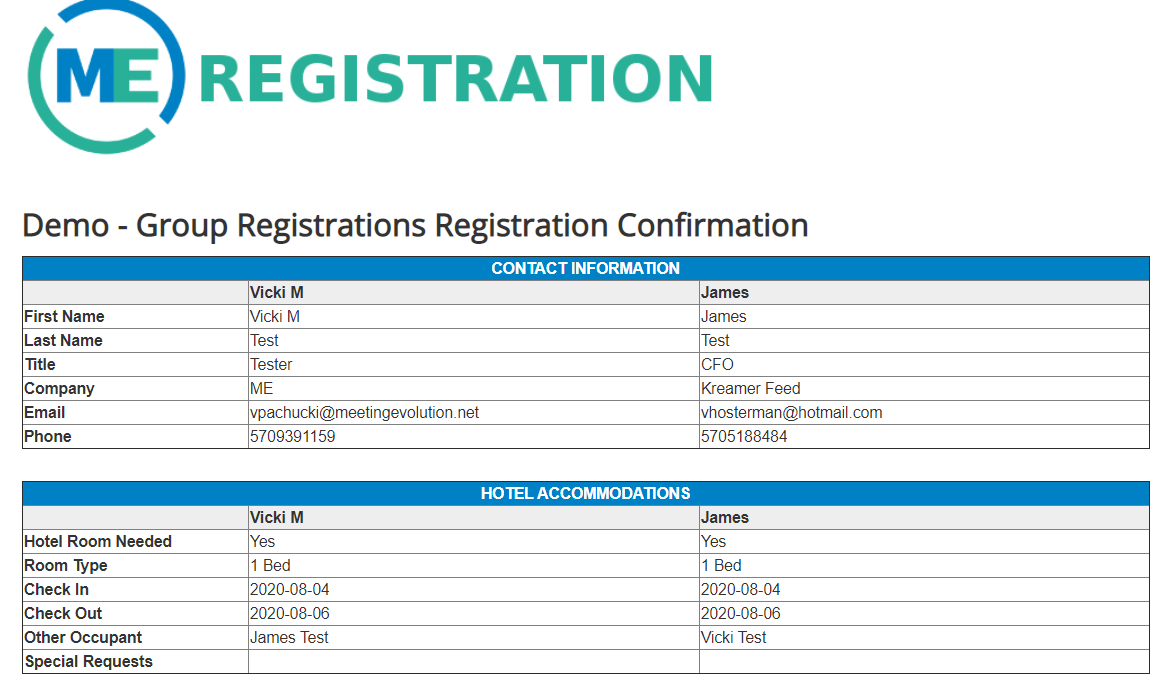
You have now set up your event for Group Registration. The confirmation will display all attendees who register in the group.
Comments
0 comments
Article is closed for comments.