
Now that you have created the Menu and provided content for your Pages, below is the third step for setting up your Registration Site to completion. The Registration Tab contains the registration form. Within this form are Sections and Fields you create. Each Form Section has a section header description and contains the form fields within that section. For example, the Contact Information section would include name, address, phone number and email fields. Notice, the SITE tab allows you to view the Registration Site you are creating throughout the creation process.
SET UP TAB -> FORM SECTIONS
To create a new section – Select the NEW FORM SECTION button. 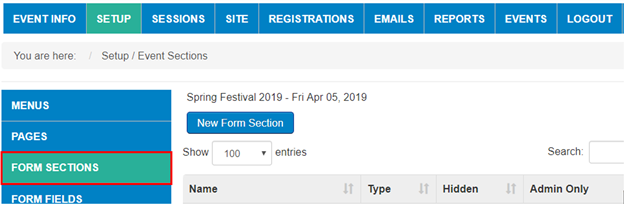
Now in the FORM SECTION MANAGEMENT
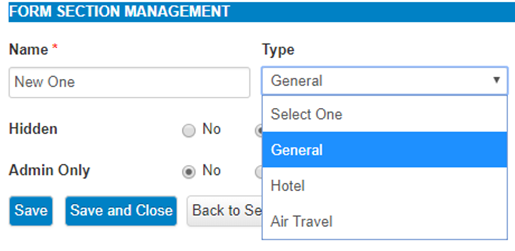
- Enter the SECTION NAME to display on Section within the Registration Form
- Select TYPE in the drop down (usually GENERAL, unless dealing with Air Travel or Hotel)
- Select Hidden - to keep section from being displayed on the registration form
- Select Admin Only - to allow Admin Users Only access to this section on the registration form
- SAVE AND CLOSE, then continue until all sections are complete
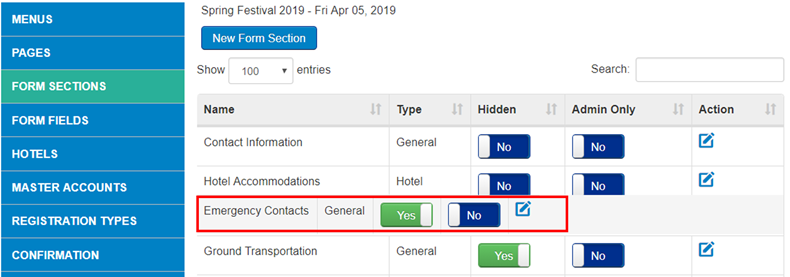
ORDER of SECTIONS: You can move sections around by clicking on the name of the section and keeping mouse button down, then move section to desired location. In the below example, EMERGENCY CONTACTS was being moved up above GROUND TRANSPORTATION. Once it is in the order you want, you can release the button on your mouse and it will stay in that location:
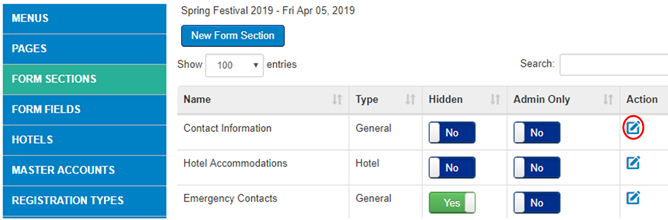
EDITING SECTION NAMES - Use the EDIT ICON under ACTION column to update Name of Section just like editing the Menu names.
Once you have created all of your section names, you can go on to the next step - Set-Up / Edit Registration FORM FIELDS
Comments
0 comments
Article is closed for comments.