
The system has the ability to setup Calendar Invites for registrants to add events to their calendar when they register. The Calendar Invite will be viewable on their submission page and confirmation email.
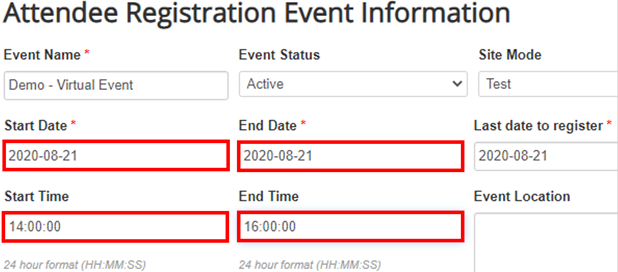
1. Click on the EVENT INFO tab to make sure you have entered all of the information the system uses to pull data into the calendar invitation.
Check Start Date, End Date, Start Time, End Time and Location(*it is crucial to enter this data correctly, as the database pulls from these fields to create the calendar invite)
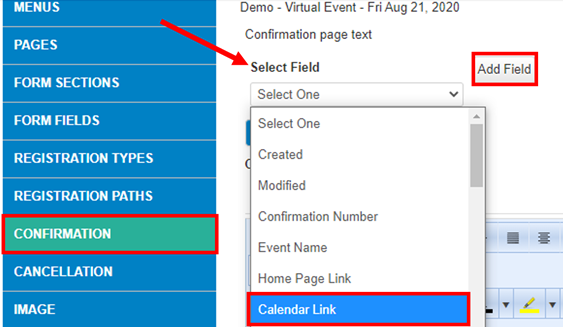
2. Go To SETUP -> CONFIRMATION
3. Add a Calendar Link option to the confirmation email. Remember, this calendar invite pulls the Dates and Times from the Event Info Tab you set up at the beginning. Use the SELECT FIELD drop down to select the Calendar Link field and then hit Add Field, this will drop it where your cursor is located in the confirmation text:
It will look like this when successfully inserted: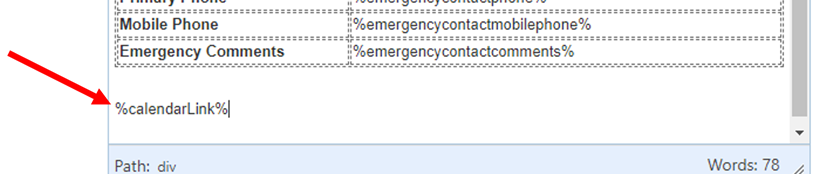
Here is a Sample Confirmation with Calendar Invite: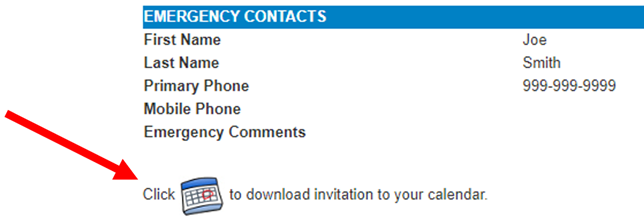
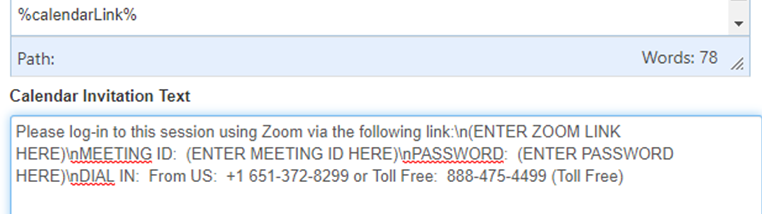
4. Add Calendar Invitation Text. This will go in the Calendar Invitation Text section below the confirmation email text area. " \n" serves as a page break. "\n\n" is a double page break. See below example:
The format will look like this:
Please log-in to this session using Zoom via the following link:\n(ENTER ZOOM LINK HERE)\nMEETING ID: (ENTER MEETING ID HERE)\nPASSWORD: (ENTER PASSWORD HERE)\nDIAL IN: From US: +1 651-372-8299 or Toll Free: 888-475-4499 (Toll Free)
On the actual Calendar Invite, it will look like this:
Please log-in to this session using Zoom via the following link:
(ENTER ZOOM LINK HERE)
MEETING ID: (ENTER MEETING ID HERE)
PASSWORD: (ENTER PASSWORD HERE)
DIAL IN: From US: +1 651-372-8299 or Toll Free: 888-475-4499 (Toll Free)
Comments
0 comments
Article is closed for comments.