
This article will review the 5 steps to setup Tickets for a registration site event. The Tickets feature allows you to invite guests to functions within your event and manage ticket allocations for each guest. It requires an Invited Guest list (Invitees).
- Step 1- Enable Tickets & Invitees.
- Step 2- Create & Setup Tickets.
- Step 3- Assign Tickets to Invitees.
- Step 4- Add Ticketed Events to your Registration Form.
- Step 5- Add Ticketed Events to your Confirmation.
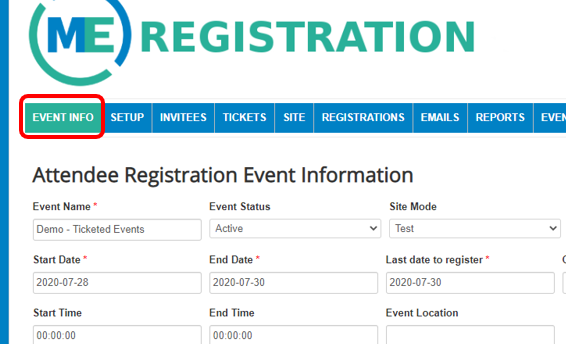
Step 1- The first step in the process is to enable tickets and invitees for your event. While in your event, click on the Event Info tab.
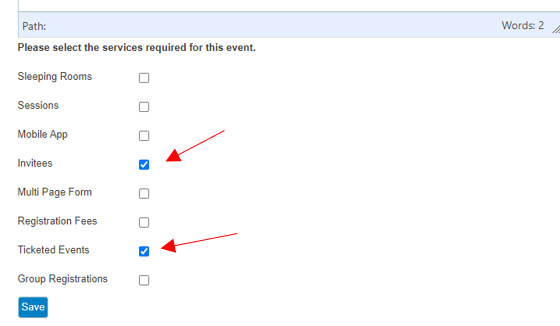
Scroll to the bottom of the form and select the boxes for Invitees and Ticketed Events. Be sure to hit Save at the bottom of the form.
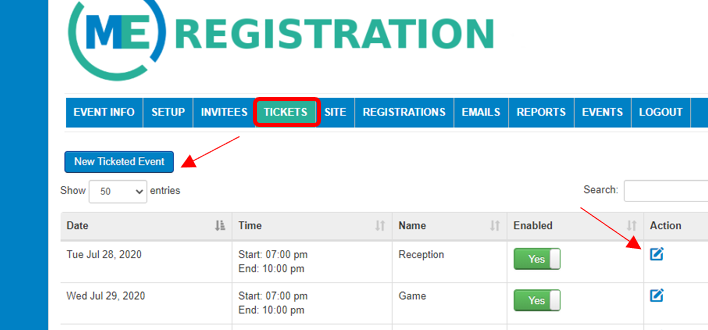
Step 2- Create and setup your tickets by clicking on the Ticket tab. Select New Ticketed Event to create a new ticket or the Edit button to the right of already existing ones.
Enter the information on your ticketed event. Name, start and end date, start and end time. Under the description you will list the details that you want to show up on the registration page when people are registering. This will include an image of your ticket and the details you entered for name, start date, etc.
In order to get the ticket and information to display correctly on the registration form, the following code will need copied into the Code tab of the ticket.
<tbody>
<tr>
<td style="width: 50%; vertical-align: top;"><img src="https://demo.events.
<td style="width: 50%; vertical-align: top;">
<p><strong>Post Game Party</strong><br />Location Loews Downtown Hotel - Rooftop Bar<br /> (Street Address, Los Angeles, CA )<br />Thursday, July 29<br />9:00 PM - 11:00 PM</p>
</td>
</tr>
</tbody>
</table>
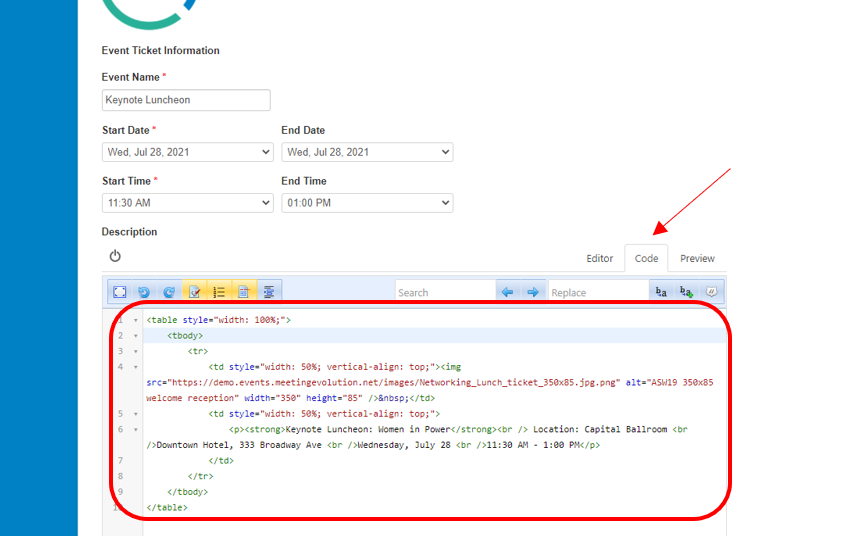
After you copy in the above code, you will then go back to your Editor tab to update the image and details on the right side of the ticket. 
To update the image, right click on it and select Insert/Edit image. Additional information on uploading images can be found here. Recommended ticket size is 350px wide by 85px high. Be sure to hit Save and Close after you are done with your changes.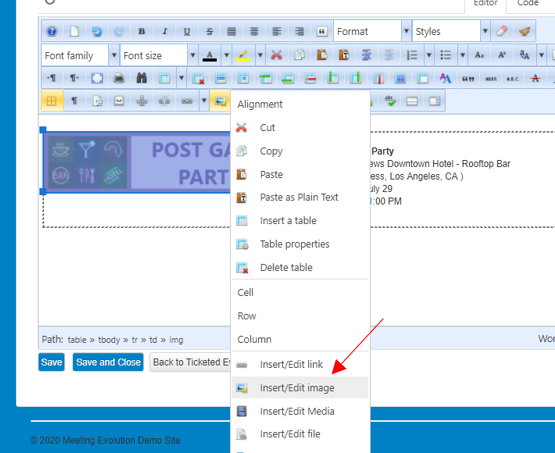
Step 3- Assign ticket amounts to your Invitees. Click on Invitees tab. If you do not have any invitees setup for your event, you can create new ones individually or your can import them using the import tool. See more information here on how to create new invitees and upload invitees. The ability exists to upload invitees with designated tickets already created on their invitee record, this takes custom programming (additional cost) but you would not need to go into each invitee record to designate tickets offered per event.
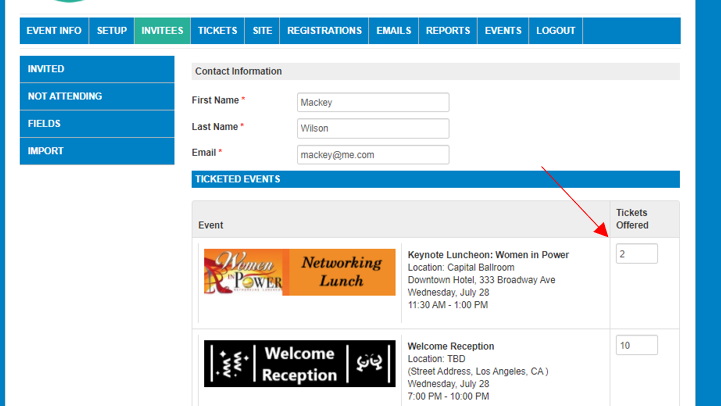
Once you have Invitees setup, you can edit their record to include the tickets you setup in previous steps. After creating a new invitee, hit the Save button and your ticketed events will appear. For existing invitees, click the edit button to the right of their record to add tickets. When registering, attendees will only see ticketed events they were invited to on their registration form.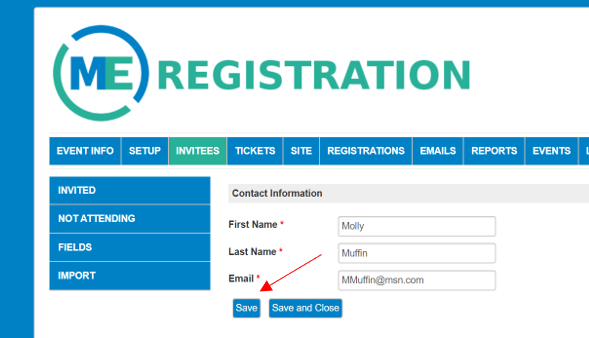
Please note- Step 3 and 4 can be interchangeable. If you do not have information available on who gets what tickets, you can complete step 3 after 4.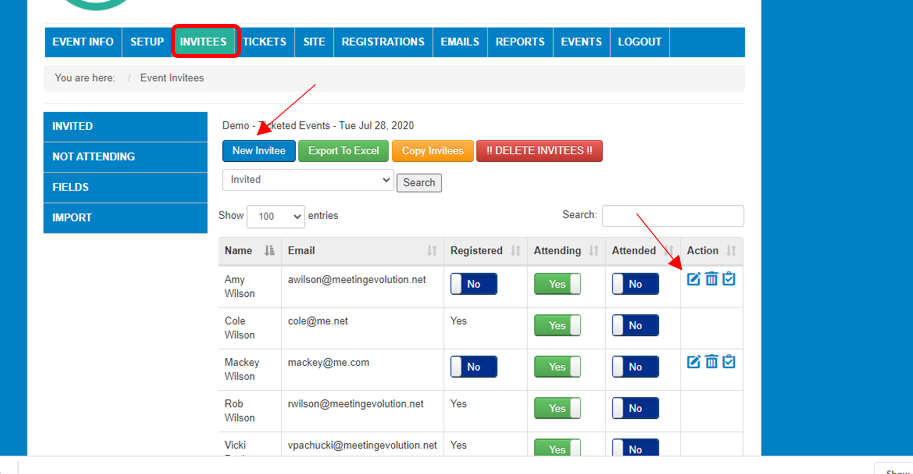
Enter the Tickets Offered amount for the invitee in the box for whatever tickets have you setup and are enabled. When the invitee registers, it will only allow them to select the amount you offer or less. Be sure to hit Save and Close at the bottom of the form after changes.
Step 4- You can now add the ticketed events to your registration form.
Please note- Step 3 and 4 can be interchangeable. If you do not have information available on who gets what tickets, you can complete step 3 after 4.
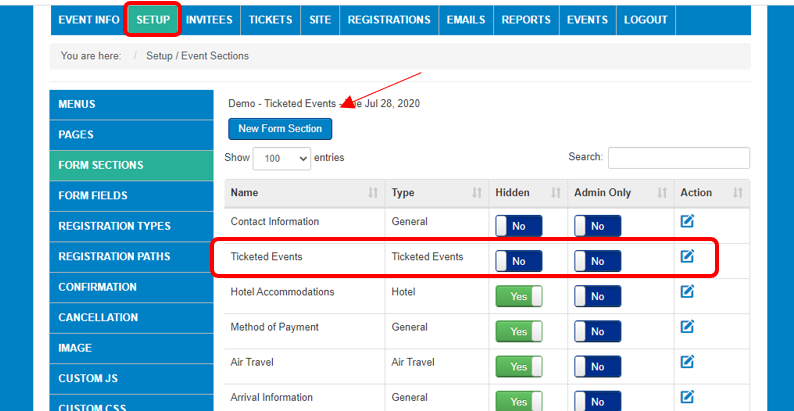
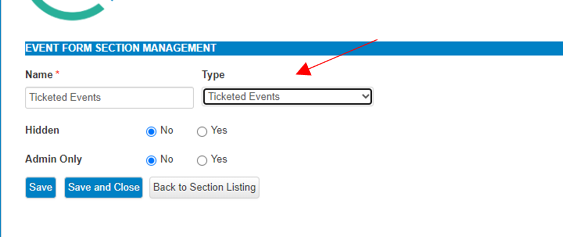
Add a section to your form called Ticketed Events. To do this, go to Setup and select the button for New Form Section. Add your section called Ticketed Events, select the Type as Ticketed Events and be sure it is not hidden or set to Admin Only.
Next you will add a Form Field for your Ticketed Events. Click on Form Fields.

Then edit a field in the EXTRA FIELDS section

Fill out the required fields. You will select Ticketed Events for your Section and Field Type. You can use the same for your Label, Column Header, Confirmation and Placeholder. Check the box for Enabled. Remember to hit Save and Close at the bottom of your form.

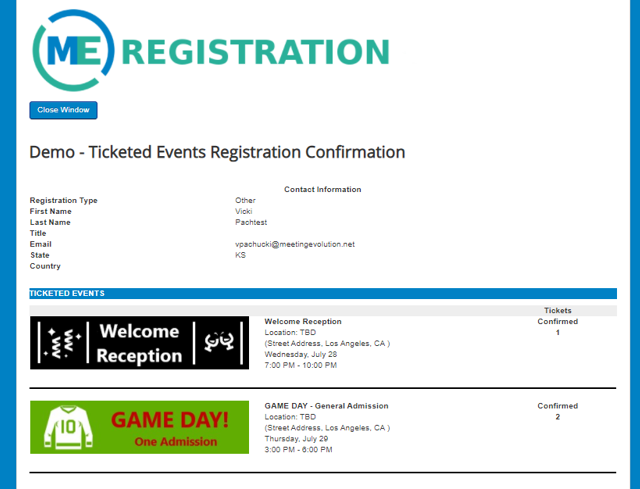
Step 5- You will need to add Ticketed Events to the Confirmation. Go to Setup-Confirmation and add the text %ticketedEvents% to the bottom of your Confirmation Text. Be sure to hit Save after your changes.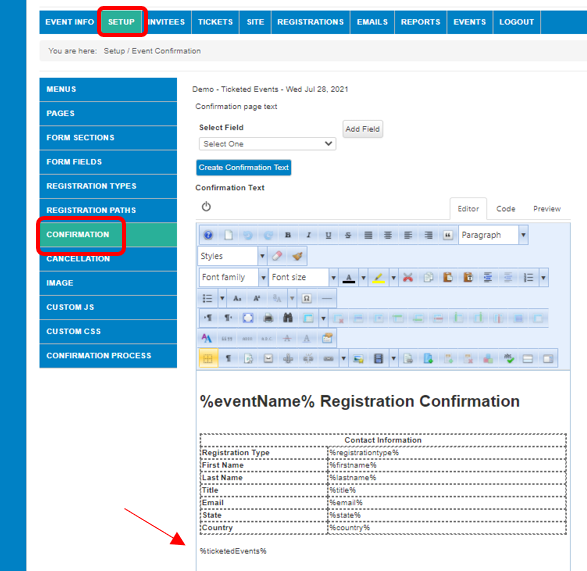
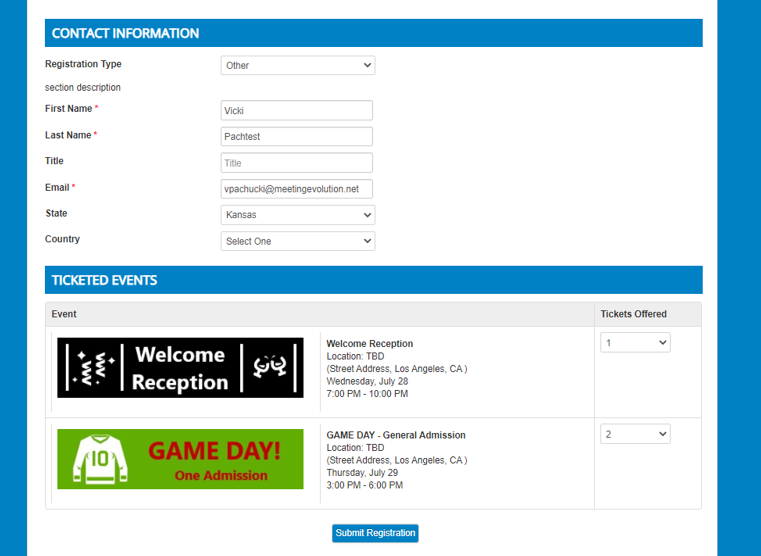
You are now setup to use ticketed events. When users register, they will only be presented the option for the tickets you setup and can enter quantity values equal or less to what you assigned each Invitee. Their confirmation screen and email will list their ticketed events.
Registration Form Example:
Confirmation example:
Comments
0 comments
Article is closed for comments.